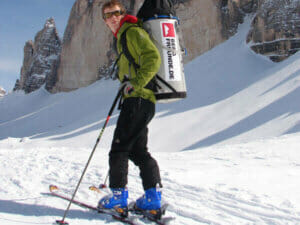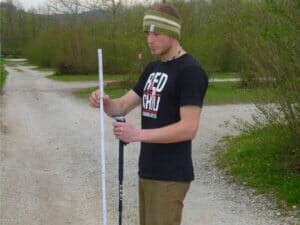
Have you ever thought about getting telescoping walking poles but don’t know where to start? Well, fellow Alpine Trekker Fritz Miller has put together the most important info for you so that you can find the right pair to fit your needs! You may be wondering what the advantages of using walking poles are. Well, walking poles not only allow you to walk more safely and efficiently but also take the strain off of your knees, especially when you’re venturing downhill. What’s more, they’re absolutely essential for trips with a heavy pack, when ski touring or snowshoeing. Plus, walking poles can come in handy if you plan on winter hiking without snow shoes or going on high mountain tour. On traditional high mountain tours, I, personally, opt to carry a single pole as opposed to two. As an aside, if you’re fairly fit and healthy, try not to fall in love with using poles, as frequent use could negatively impact your sense of balance. After all, you can hill walk just fine in the summer without them. The same goes for a leisurely stroll in your local park.
Who uses what?
Fortunately, deciding on a pair of walking poles isn’t as difficult as picking out a pair of mountaineering boots, a new smartphone or a cute puppy. In other words, the things you need to take into consideration when buying walking poles are pretty straightforward.
Number of segments

Most walking poles have 3 segments. This not only makes them easier to adjust to the appropriate length but also allows you to store them (when completely collapsed) in your travel bag or on the outside of your backpacks. The latter is a great option to have for steeper sections of a climb or when taking the bus back to the trailhead. But when on a bus or train, try to remember to keep the tips pointing down!
2-section poles are particularly suited for skiing. After all, when you’re forced to carry large skis around, it won’t really matter whether your poles pack down nicely or not.
4-section telescoping poles are even more compact than 3-section poles, which is great for transport. But, I don’t think that justifies all the extra fumbling around and the (somewhat) heavier weight.
Newer 3 or 4-section folding poles are great for minimalists who prefer a small pack size and less weight. However, these usually don’t have an adjustable length and come at a higher price.
Material and weight
If you want to go light, there’s no way around carbon fibre poles. However, my personal experience has shown these to be less durable than aluminium. Of course, in this context, not only the material but also the strength thereof plays a crucial role. Heavier poles tend to be more stable than lighter models and thus more suitable for expeditions and heavier people.
Handles and straps
Light foam handles with a covering on the uppermost segment are great for mountaineering, as this feature allows you to hold onto the part just below the handle in steeper terrain. You can also wrap the bare pole with handlebar tape or something similar to achieve the same effect. When trekking, it is particularly important that the grip feels comfortable and keeps your wrist in a good position. Other common handles include rubber and cork grips, both of which are quite comfortable. Cork is usual found on the more expensive models. By the way, the higher-quality poles are often equipped with ergonomic grips that have a corrective angle for comfort. Another important feature is the wrist strap. It is important that the wrist strap is comfortable, distributes the pressure and doesn’t cause chafing. Otherwise, you’ll get blisters very quickly. Many poles have the buckle for adjusting the wrist strap hidden away in the handle, which I find to be particularly comfortable. If the buckle’s on the strap itself and ends up rubbing up against the back of your hand, it can be really bothersome, unless you happen to be wearing padded gloves.
Locking mechanism
The traditional lever or clamp-like mechanism on the pole is not bad, but it does have some disadvantages: For one, it tends to open by itself every once and while, and we can’t have that! In fact, I ran into this problem on a regular basis during one of my multi-day treks. It absolutely refused to close! Some may be able to deal with this, but I couldn’t. More reliable locking mechanisms are those that work much in the same way as a quick release on a bike seat post. Leki refers to this mechanism as the “Speed Lock System”. As the name already suggests, the Speed Lock Mechanism allows you to adjust the length much more quickly.
Tips and baskets

A hard metal tip is quite the good thing to have. After all, you wouldn’t want your pole to slip, would you? A basket near the tip serves to prevent the pole from drowning in mud or disappearing into every single little crevice. Personally, I find small trekking baskets to be perfect for the summer. They even get the job done when you’re forced to traverse patches of old snow. But, in such situations, I’d steer clear of micro baskets. Larger baskets (approximately palm sized) are better for winter tours.
Shock absorbers
Some telescoping poles come complete with an anti-shock system or shock absorbers. The shock absorber can be activated for a downhill climb and is designed to take the strain off of your hand/arms. But, you have to be pretty sensitive to really appreciate the “cushion” such a shock absorber provides.
Pole length

Most poles for walking and mountaineering have an adjustable length. So, no need to worry about finding the exact size – you only have to know the approximate length. If you’re preparing for your trip, our walking pole length calculator could help you determine which length is appropriate for you based on your height and the area of use. But, if you’re already out in the hills or just need to find out fast, have a look at the picture to see how to determine the proper length.
It’s best to make your poles shorter for longer, steeper uphill climbs and longer for steep downhills. Ski mountaineers use telescoping poles as well, which can be lengthened for uphill climbs and shortened for alpine descents (see also our size calculators for alpine ski poles, cross-country ski poles and nordic walking poles).
If you have any questions, feel free to ask our experts in customer service. They are available on weekdays between 9 a.m. and 4 p.m. and can be reached by phone at 03 33 33 67058 or via e-mail. This article was last edited on 31/01/2017.


