
To someone who has never climbed before, an artificial climbing wall may just look like a wall with a bunch of randomly placed hand and footholds. But an experienced eye will see an array of climbing routes and movements. Plus, an experienced climber will also more quickly recognise how to best grip a climbing hold and which position his body should be in at any given moment. This article will help you develop a better eye for climbing holds.
Types of climbing holds
Jugs:

Every beginner’s favourite hold. Even if they’re few and far between on more difficult routes, unless there’s an overhang.
Even if jugs make it tempting to climb using brute force to pull yourself up, this “technique” will just frustrate you in the long term. Pullups won’t get you very far on rock walls and difficult routes. For these, proper climbing technique is much more important. That’s why you should practice indoors on vertical routes and those with a slight overhang to perfect the basic techniques. When the difficulty increases and the jugs only serve as a spot to rest, good climbing technique is much more helpful than pure strength.
 Ledges

One of the first major hurdles you will encounter are the very small ledges (often called crimps) where only one or two fingertips have space. If you have excellent finger strength, these usually don’t pose a big problem. But as annular ligament injuries in the fingers are among the most common injuries in sport climbing, ledges should always be “enjoyed” with caution. Depending on how you place your fingers, ledges can really put a strain on your fingers.
Correct placement reduces the risk of injury. We distinguish between three grip techniques:
- full crimp
- half crimp
- open grip
The safest but most technically demanding grip is the open grip. Because of the smaller angle, the body needs to be positioned more carefully. This is why most climbers use either a half crimp or full crimp when climbing. This creates a larger angle, which allows you to actively pull on the grip when moving through a wider range of motion (see image). In a full crimp, you also use your thumb, but this position puts a high amount of stress on the annular ligaments.
As far as injury prevention goes, it makes more sense to climb using an open grip. However, climbing with crimped fingers is a part of climbing and is unavoidable on very small edges. You can learn more about preparing your fingers for the stresses of climbing in our article on finger strength (currently only available in German).


Pockets

Slim fingers tend to have the advantage here because the size of a pocket determines how many fingers you can stuff in there.
But just as with ledges, there is a high risk of injury, which is why you should pay a lot of attention to how you position your fingers. Pockets with sharp edges place additional stress on your ligaments. The two-finger pocket is the most common type of pocket hold. Which fingers you use is generally not all that important because there’s no difference between the combination of ring and middle finger and an index and middle finger when it comes to muscles. However, because of the anatomical differences in the lengths of the fingers, one of the two options will often feel more comfortable.
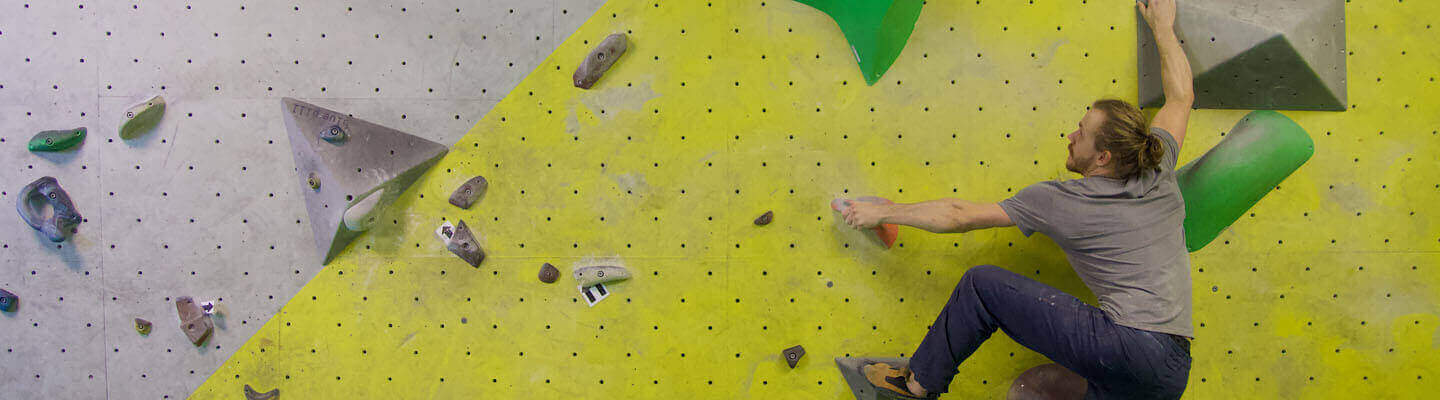
Sloper
These large, smooth holds should be gripped with the entire surface of the hand. These holds are all about friction, and this is dependent on both the pressure you exert and the contact area. Some slopers also have small raised areas that can be held onto like edges.
One of the most important factors when it comes to slopers is the direction of pull (see article 1). On easier routes, there is usually a foothold directly underneath so that you can “dive” right under the hold (as seen in image 2). More difficult routes will require more technique and strength. It’s often necessary to create counter-pressure using other parts of the body (as in image 1).


Volumes
These aren’t all that different from slopers and, because of their size, they can also be used for support as in the first image. But if you’re underneath a volume, it can be a bit trickier. They’re easiest to grab hold of if you place your fingertips at the edge of the volume.


Supports
You don’t always need to pull yourself up using holds; it can also be helpful to support yourself with your hands. If there’s a good hold with fewer support options, you can press your hand against the wall to take the stress off of one of your feet.
Pinch
Like twisting a bottle cap! By using the thumb for opposing force you can create additional pressure in a pinch. Depending on the size of your hand, wide pinches will be more or less difficult to hold. Aside from that, you should pay attention to your positioning, as it may be possible to hold them like a ledge.

Horns and edges
One hold that is rarely found outdoors, but frequently in climbing gyms, are holds that stick out of the wall like a branch. These allow you to grip with the entire heel of the hand to relieve the stress on your finger muscles.
What’s next?
In this article, you learned about the different types of holds. But there are subtle differences between the individual types that can end up being the deciding factor between success and failure on a route. You’ll learn about these in the next article.
Until then, have fun climbing and bouldering!